





.jpg)

Jazz Style (1) Bass Guitar Built For Schenectady New York Band "Railway"
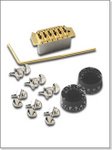
A Jazz Style (1) Bass Guitar was to be built for the Schenectady New York area country/rock band called "Railway". This bass was is outfitted with J-Retro active electronics, Aero Instruments (2) jazz style pick-ups manufactured to ThunderHouse Instruments specifications and an unusually rare experimental bass vibrato/tremolo unit in the tailpiece. Pickguard, with "Railway's" logo, was custom made for ThunderHouse Instruments by Terrapin Custom Pickguards.
Body was Rock Maple as was the neck. Neck laminations were of the exotic species 'Bubinga' and was outfitted with an Ebony fingerboard. Green Abalone was used for inlay material. Finish was an environmentally friendly water based Lacquer by Crystalac. Medium-High 18% Nickel-Sliver fretwire (Width=0.095", Crown= 0.045", Tang= 0.073") was used as was a brass nut with no Zero Fret. Scale length was a standard 34".
Schaller Security Straplocks and Tuning Heads were used. D'Addario Long Scale EXL-160 Medium Round Wound Bass Strings were to complete the project.
Because of my illness, the project remains 90% completed, however as I am unable to access my shop in my current state, it remains a "work in progress" until a further date.
(1) "Jazz Style" refers to the Fender Jazz Bass, a registered trademark of Fender Guitars.
(2) Aero Instruments owned by Larry J. Pollack was located in Oceanside California when I visited their shop. They have since moved their operations to Hilo Hawaii.
* * *
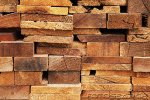
 Maple or Ash is generally used for Jazz or Precision style basses for it's traditional sound and sustain.
Here the selected piece is sent through a planer to reduce its thickness to that desired.
 The blank stock of maple is now verified for thickness with the calipers shown. This body is made by joining two widths of the maple together (taking into consideration the orientation of the grain). Wood is cut to length. Top horn is longer than the lower therefore the the blanks joined need not be equal in length. Cuts can be made on a table saw or chop saw.
Here the two pieces of maple are prepared for gluing. The sawn edges can be run through a jointer to ensure that they are perfectly flat and square. This gives the tightest and strongest seam almost inviable to the eye.

Here the two blanks are glued together and clamped. Carpenter's glue or two part Epoxy glue can be used. Wooden biscuits or dowels can be used to give extra strength to the body joint.
 To get the shape of the body you can enlarge a photocopy (center) from a magazine photo if you cannot get an instrument body to trace. (some distortion may occur but is usually negligible) The photocopy can then be traced onto a piece of cardboard or fiberboard (masonite) to make a permanent template (left) if more than one guitar is anticipated. An already prepared body is seen on the right.
 Asymetrical maple blank has outline drawn onto it using the previously prepared template.
It is probably advisable to route out all body cavities (neck pocket, pick-ups, electronics bay, etc.) at this stage. Because the body is not yet cut to shape, there is much more surface area to support the router for a clean and accurate cut. Can be done afterwards if necessary. Less precision is required if a pick-guard covers the pick-up cavities as it will hide errors.
 Maple Blank is seen here with the cavities routed out.
The routing is made using a fiberboard template of the shape cut out of it. A straight cut router bit with an upper bearing was used. The bearing follows the pattern as the router bit is incrementally plunged into the wood. Repeated shallow cuts going deeper on each pass gives the cleanest result and put the least stress on the router's motor.
 This bass guitar has a unique vibrato tail piece therefore there is a cavity on the reverse to accommodate the assembly. Seen here is double sided sticky tape used to securely hold the template to the wood. Clamps can also be used but make sure they are positioned firmly however, make sure their position does not interfere with the router.
 Here it is shown how the (unrouted) body would be cut out on a band saw. Ripping fence on left was removed for the freehand procedure.
 Routed body being cut out on band saw. Allow enough wood outside of the pencil line to allow for sanding.
After bandsawing the body, sand the edges smooth to provide the best surface on which a router bearing can ride. This smooth surface will allow the round-over bit on the router to make a fine cut in removing the sharp edge of the sides. This initial round-over will then be further refined using whatever tools are available. I have used everything from wood rasps & files, planes, spoke shaves, carbide grinders and sanding discs on an electric hand drill.
Here the sanding is performed by a sanding drum on a drill press. I also use a stationary oscillating sander but diligent hand sanding can also accomplish the job.

View of body ready to be contoured with a 1/2" round-over bit. Take in consideration as to how the grain runs but generally try to cut with the router in the direction of the spin of the router bit. That is, in order to reduce splintering and tear out of the wood grain, the router bit should rotate into the wood in order to get a smooth cut. This usually would mean running the router clockwise around the project.
 Here a right-angle grinder with a carbide cutting head is used to cut more radical contours into the body surface. This tool is simply more aggressive and can reduce the time spent on this procedure. Again, other more readily available tools can be used to accomplish the same results.
Contoured and sealed body is ready for paint application. Filling of pores is not necessary on maple or ash as the grain is quite fine and a smooth clean surface prepared by sanding is quite sufficient. I tend to start with about 80 grit paper and work through 100, 120, 180 & 240 grits. Finer grits are not necessary and probably unadvised at this actually polishes the wood and becomes too smooth. If too smooth the wood provides no surface for which the paint to "bite" into and hold. The sealed wood should be scuffed up slightly with fine (240) grit paper and then cleaned by wiping down with a slightly damp cloth, blown clean with compressed air, or wiped with a 'tack cloth'. Make sure the surface is clean and dry before painting and if using a tack cloth, make sure it is compatible with the finish being applied. (ie. water or solvent based)
 An inexpensive HVLP (High Volume Low Pressure) spray painting unit is shown. Various finishes can be used from automotive paints to clear, tinted or opaque specialty lacquers formulated specifically for wooden instruments. The traditional finish of choice has been Nitrocellulose lacquer, however it is very volatile and now no longer easily available to the general public. Much more environmentally friendly water borne finishes are now available which are comparable to the glossy finish of nitrocellulose.
 Shown is the body sprayed with primer. An ebony neck is shown laid on top of the neck blank. The ruler indicates the 34" scale length of the Jazz type bass.
This verifies the correct position of the tailpiece.

Tinted primer coat sprayed onto body.
 Several coats of the final pigmented coat was followed by protective coloured clearcoats. (When cutting and drilling body contours, add sufficient size to allow for the layers of finish - otherwise parts will not fit into their positions.) Set the painted instrument aside for several days to weeks to allow for the finish to cure and "gas out". Solvent based finishes should be left until the volitile substances have left the body. The body should have very little odour when ready. At this time the finish can be "rubbed out" which is polishing it with subsequently finer compounds such as tripoli, pumice and rottenstone. This procedure removes any imperfections such as dust particles which may have settled on the instrument and produces a superior glossy shine to the surface.
 Original artwork was obtained from the band "Railway" and forwarded to Terrapin Custom Pickguards of Eugene Oregon who did a fantastic job embedding the logo into the pickguard material.
Construction of the Bass Guitar Neck
 Wood resawn for laminates in the construction of the Bass Guitar Neck. Here Bubinga (African Rosewood) is shown.
Usually Rock Maple is used as the structural wood because of it's strong and stable characteristics. Contrasting exotic woods are often used as laminates such as mahogany or rosewood, purpleheart or bloodwood.
 Mahogany being resawn on Bandsaw to obtain laminate strips for neck construction. Lamination adds strength against string tension, reduces the chances of warping and adds aesthetics to the finished neck. Grain orientation can be both quarter sawn or flat sawn, however I prefer using quarter sawn wood as I believe this grain orientation is stronger and projects the sound better.
 Rock Maple neck with Bubinga wood laminates shown ready for assembly. After resawing to thickness the pieces were run through the planer to ensure flatness. After planing they are rough sanded, leaving enough surface to allow the glue to "bite".
I prefer to use West System Epoxy Glue on the neck assembly because I feel it provides superior strength, the glue line sands down nicely and is barely visible and it adheres well to exotic wood species, especially oily woods.
 Here the neck laminates are glued and clamped. The two part epoxy system can be seen in the background.
Glued up Neck blank is run through the planer to "clean it up", making it square and removing glue seepage.
 In order to add extra stiffness to the neck, carbon fiber rods are inserted. This prevents flexing due to the tensioned strings on the assembled bass. In order to insert the rods, channels are routed into the upper surface of the neck equidistant from the edges and to the depth of the rod. Rods are epoxied into the slots.
A 1/4" straight cut router bit is employed using a router table. The fence is adjusted equidistant from the edge of the neck to where the channel is desired.
An additional channel is cut in the exact center of the neck to accommodate the Truss Rod which is an adjustable metal rod allowing back or reverse tension to be applied to the neck to compensate for the strings tension.

The wood is plunged onto the router bit then pushed from the starting point to the end point marked by pencil on the wood and by tape on the router table.


As Stated; Carbon fiber rods inserted into routed slots.

Truss Rod (wrapped in tape) inserted into center routed slot. End of Truss Rod protrudes from, or has access from the end of the finished neck. A screwdriver or allan wrench adjusts the degree of back tension.

Epoxy is again used to glue in the carbon fiber rods. Wax paper is placed on top of the glued rods and then a scrap piece of wood is placed on top sandwiching the wax paper in between. This clamps the rods in place while the glue sets and flattens the glue squeeze out reducing cleanup.
The truss rod is not glued in as it must be free to expand and flex. A double expansion truss rod was used in this build.

Wings are glued and clamped onto the neck to provide material for the headstock. This should be done after routing for obvious reasons.
 A photo that is rather difficult to understand. This photo is the top of a table saw. In order to cut the slots in the fingerboard, the ebony blank having been prepared is attached by double sided tape to an aluminum template having slots cut at predetermined intervals corresponding to a 34" scale. This assembly is placed against a fence attached to the T-fence of the table saw which has been fitted with a 0.023" thick fret cutting blade adjusted to the height corresponding to the depth of the fret tang to be used. The fingerboard is pushed through the blade at a right angle cutting the slot, then advanced to the next predetermined fret position by means of a pin in the fence corresponding to a slot in the aluminum template. Cut, advance and repeat until all fret slots are cut. The number of frets can vary.
 The layout of the neck is checked against the positioning of the fretboard (fingerboard) to ensure proper placement of the nut (the do-hicky the strings go over at the head) and the rear bridge or tailpiece. Edge to edge it must be 34" for that scale and the 12th fret must lie exactly at the midpoint. Failing that, the guitar will always be out of tune. These measurements are crucial!
 Here the excess wood is trimmed away by band saw or by using a hand saw. Improvise!

Head stock contours sanded on an oscillating spindle sander. Alternatively a sanding drum in a drill press can be substituted or even careful sanding by hand or a belt sander can accomplish the task.

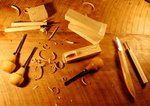
 A variety of rasps, spoke shaves and finger planes which can be employed to contour the neck making it not only pleasable to play but even custom shaped to the musicians hand.

Using a light box, my logo of THI (ThunderHouse Instruments) can be transcribed onto the inlay material. This material can be whatever the imagination can dream up from precious metals and stones, to man made materials such as corian or plastics. Wood veneers can be inlaid as marquetry. Traditionally materials from shells have been used such as the myriad of colours found in 'Mother of Pearl (MOP) and Abalone.
 For added glitter a channel was routed alone the edge of the headstock into which green abalone shell strip was inlaid. Curved abalone strips (laser cut) can be broken by hand, edges filed and placed end to end to obtain whatever radius is required.
Note that the carbon fiber rods and truss rod channel are clearly visible in this photo.

Too delicate to clamp, the glued abalone strip is taped to the channel while it dries.
 The fingerboard (fretboard) can be left unbound where the edge is just relieved (rounded over) for a pleasant feel. Alternatively it can be bound by a contrasting wood species or plastic. This is purely for aesthetic reasons. The contrast of colours is often appealing and the ends of the metal frets are hidden behind the binding.
Here the plastic binding is glued to the fingerboard with acetone based plastic glue and clamped securely.
When dry it can be contoured using a finely set small plane, scraped with a metal cabinet scraper, and polished up to it's original shine with 3M Micromesh abrasives.

Read More!

As illustrated, routed channels are shown with the carbon fiber rod at the side ready for insertion.
Truss rod channel has yet to be cut.
Alternately the channels can be cut by carefully placed repetitive cuts on a table saw, carefully chiseled out by hand, or omitted completely.
Truss rod channel has yet to be cut.
Alternately the channels can be cut by carefully placed repetitive cuts on a table saw, carefully chiseled out by hand, or omitted completely.

As Stated; Carbon fiber rods inserted into routed slots.

Truss Rod (wrapped in tape) inserted into center routed slot. End of Truss Rod protrudes from, or has access from the end of the finished neck. A screwdriver or allan wrench adjusts the degree of back tension.

Epoxy is again used to glue in the carbon fiber rods. Wax paper is placed on top of the glued rods and then a scrap piece of wood is placed on top sandwiching the wax paper in between. This clamps the rods in place while the glue sets and flattens the glue squeeze out reducing cleanup.
The truss rod is not glued in as it must be free to expand and flex. A double expansion truss rod was used in this build.

Wings are glued and clamped onto the neck to provide material for the headstock. This should be done after routing for obvious reasons.
 A photo that is rather difficult to understand. This photo is the top of a table saw. In order to cut the slots in the fingerboard, the ebony blank having been prepared is attached by double sided tape to an aluminum template having slots cut at predetermined intervals corresponding to a 34" scale. This assembly is placed against a fence attached to the T-fence of the table saw which has been fitted with a 0.023" thick fret cutting blade adjusted to the height corresponding to the depth of the fret tang to be used. The fingerboard is pushed through the blade at a right angle cutting the slot, then advanced to the next predetermined fret position by means of a pin in the fence corresponding to a slot in the aluminum template. Cut, advance and repeat until all fret slots are cut. The number of frets can vary.
(confused? I am!)
Alternatively, the slots can be cut by hand using a handsaw of the same kerf size (thickness) and some very accurate measurements. The fret positions for any scale can be determined mathematically however for ease and those mathematically challenged a Fret Spacing Calculator can be used. The layout of the neck is checked against the positioning of the fretboard (fingerboard) to ensure proper placement of the nut (the do-hicky the strings go over at the head) and the rear bridge or tailpiece. Edge to edge it must be 34" for that scale and the 12th fret must lie exactly at the midpoint. Failing that, the guitar will always be out of tune. These measurements are crucial!

Head stock contours sanded on an oscillating spindle sander. Alternatively a sanding drum in a drill press can be substituted or even careful sanding by hand or a belt sander can accomplish the task.

A router with a 1/2" round over bit can be used to trim off wood rounding the back of the neck. This reduces the amount of manual work that has to be done by hand using spoke shaves, rasps and sanding.
Again, note the rotation of the router bit and move cutting into the wood as you advance to reduce tear out. A variety of rasps, spoke shaves and finger planes which can be employed to contour the neck making it not only pleasable to play but even custom shaped to the musicians hand.
Using a light box, my logo of THI (ThunderHouse Instruments) can be transcribed onto the inlay material. This material can be whatever the imagination can dream up from precious metals and stones, to man made materials such as corian or plastics. Wood veneers can be inlaid as marquetry. Traditionally materials from shells have been used such as the myriad of colours found in 'Mother of Pearl (MOP) and Abalone.
 For added glitter a channel was routed alone the edge of the headstock into which green abalone shell strip was inlaid. Curved abalone strips (laser cut) can be broken by hand, edges filed and placed end to end to obtain whatever radius is required.
Note that the carbon fiber rods and truss rod channel are clearly visible in this photo.

Too delicate to clamp, the glued abalone strip is taped to the channel while it dries.
 The fingerboard (fretboard) can be left unbound where the edge is just relieved (rounded over) for a pleasant feel. Alternatively it can be bound by a contrasting wood species or plastic. This is purely for aesthetic reasons. The contrast of colours is often appealing and the ends of the metal frets are hidden behind the binding.
Here the plastic binding is glued to the fingerboard with acetone based plastic glue and clamped securely.
When dry it can be contoured using a finely set small plane, scraped with a metal cabinet scraper, and polished up to it's original shine with 3M Micromesh abrasives.

Fret markers can be inlayed at the appropriate intervals along the fingerboard. Traditionally they have been shell dots or blocks. Now days with CNC computers, intricate designs and patterns can be cut in both the fretboard and the inlay material to match exactly.
I have chosen to use green abalone shell dots in this project. They are 6mm in diameter and therefore a forstner bit (think of a flat bottomed drill bit) is used to make shallow holes for the dots. The shell dots are glued in with epoxy mixed with coloured pigment chosen to match the wood tone and left slightly above the surface of the fingerboard. When dried the fingerboard and dots are sanded flush to the radius of the fingerboard itself.
 The bound fingerboard has dots inlayed and requires some additional sanding to bring them out. The fingerboard is sanded with progressively finer sandpapers from about 320 to 400 to 600 grit papers.
Frets are bent, cut and inserted after the fingerboard is glued to the neck itself. Again, placement is crucial!
Frets are leveled to make sure they are all at the same height. They are then crowned to restore the curved surface and rounded as they approach the edge of the neck for ease of playing. Finally the frets can be polished with papers and/or 0000 grade steel wool. Fretboard oil can be applied to preserve the wood.
I have chosen to use green abalone shell dots in this project. They are 6mm in diameter and therefore a forstner bit (think of a flat bottomed drill bit) is used to make shallow holes for the dots. The shell dots are glued in with epoxy mixed with coloured pigment chosen to match the wood tone and left slightly above the surface of the fingerboard. When dried the fingerboard and dots are sanded flush to the radius of the fingerboard itself.
 The bound fingerboard has dots inlayed and requires some additional sanding to bring them out. The fingerboard is sanded with progressively finer sandpapers from about 320 to 400 to 600 grit papers.
Frets are bent, cut and inserted after the fingerboard is glued to the neck itself. Again, placement is crucial!
Frets are leveled to make sure they are all at the same height. They are then crowned to restore the curved surface and rounded as they approach the edge of the neck for ease of playing. Finally the frets can be polished with papers and/or 0000 grade steel wool. Fretboard oil can be applied to preserve the wood.
* * *
Again, this project has remained unfinished due to my illness. I hope to get back to my shop sometime in the future and complete this bass in order to be able to present it to the band.
* * *


